Please excuse the quality of the photos. It was late – as in nearly midnight, when this project began. It was one of those times when I just decided, I’m going to do this. And I did. For some reason, I was so eager to complete the project that the only thing on my mind was completing the project. (Not the photo quality.)
Although the step-by-step photos are kind of grainy, the finished product is adorable.
")
Step 1. Find it. Find an old (as in something you no longer wear) shirt, or in my case dress. Grab a pair of scissors and say good-bye to an oldie but goody. Sadly, this “old” dress was only worn once before that terrible white paint stain ruined it. So, it was chosen to be re-purposed after seeing a pin on Pinterest.
Step 2. Cut it. Cut the shirt/dress underneath the arm. The length will determine the width of the scarf. Typically, this would take one cut – but, my “old” dress had a weird bottom trim.
")
Step 3. Slice it and dice it.
Step 4. Pull it.

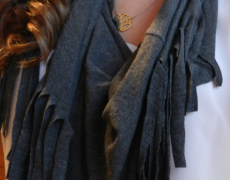
Step 5. Wear it!
Whew, I feel like we just dominated a Bop It game! (If you’ve never heard or played the game, see here.)

And there you have it – an easy, step-by-step tutorial for making a lightweight, fringe scarf to wear this fall. What do you think? Would you wear it? Do you like it? I sure hope so!
now, do it yourself! brianneps. I have my sweet husband to thank for the photos of me wearing the scarf. Thanks for your patience and participation, J!